Hosting WCF Service 4.0 in IIS 7.5
Hi Everyone,
Today I want to show you what I did to get my WCF Service hosted on my development machine IIS (this could be your web server too). I am using VS 2010, .NET 4.0 framework, and IIS 7.5 in Windows 7 environment.
In this demonstration I am going to use my AlkitabWebService.svc found in this post: Silverlight 4 Simple Project Part 2 (WCF Service).
Step 1 - Enabling IIS + ASP.NET Registration


Step 2 - Publish the WCF service from VS 2010

This will create a folder for your WCFService that you can refer to from IIS in the next step.
Step 3 - Create New Application in IIS

Step 4 - CrossDomain.xml and ClientAccessPolicy.xml
Step 5 - Test your WCF Service


Today I want to show you what I did to get my WCF Service hosted on my development machine IIS (this could be your web server too). I am using VS 2010, .NET 4.0 framework, and IIS 7.5 in Windows 7 environment.
In this demonstration I am going to use my AlkitabWebService.svc found in this post: Silverlight 4 Simple Project Part 2 (WCF Service).
Step 1 - Enabling IIS + ASP.NET Registration
- Click Start -> Control Panel -> Programs -> Programs and Features.
- On the left tab, click Turn Windows Features on or off. Turn on the features below and click OK.

- When you go to http://localhost , you will now see the IIS7 homepage.
- Now go to a command prompt and run aspnet_regiis:

Step 2 - Publish the WCF service from VS 2010
- Right-click the project and click Publish.
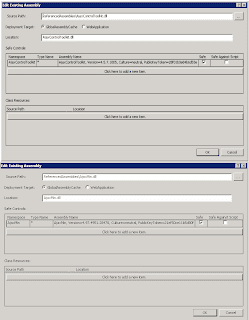
- Choose 'File System' as Publish method, and type C:\inetpub\wwwroot\AlkitabWebService\

This will create a folder for your WCFService that you can refer to from IIS in the next step.
Step 3 - Create New Application in IIS
- Go to your IIS Manager (can be accessed from Administrative Tools).
- Right-click Default Web Site -> Add Application...
- Enter in the Application Name and point the physical path to the folder that contains our published WCF service.

Step 4 - CrossDomain.xml and ClientAccessPolicy.xml
- In order to be able to access your localhost in IIS, you need to implement a cross domain policy. I'm just going to make this simple. In your C:\inetpub\wwwroot folder, create a crossdomain.xml and clientaccesspolicy.xml files:
- Crossdomain.xml
- Clientaccesspolicy.xml
Step 5 - Test your WCF Service
- In IIS Manager, click the AlkitabWebService (alias).
- On the right tab, click Browse*:80 to go to your http://localhost/AlkitabWebService/
- You should get the view like this:

- Clicking on AlkitabWebService.svc is our Service page. Yay!

Comments
Post a Comment