Silverlight 4 Simple Project Part 3 (MVVM Pattern)
Silverlight 4 Simple Project Part 2 (WCF Service)
In Part 2 we already created our WCF Service that can return some results to us when functions are called.
In this post I will start building my Silverlight Application :)
Silverlight Project
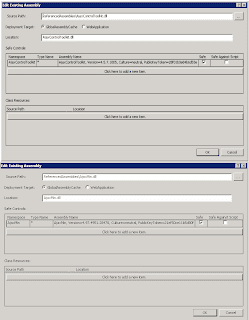
Create new project inside the same solution. Choose Silverlight Application and name it AlkitabApplication. Right-click the project and choose Add Service Reference. click Discover and you can see that our AlkitabWebService.svc is shown. Easy!

In the above picture you can also see that I created three new folders called Model, ViewModel, and Views. Move the MainPage.xaml to the Views folder.
Model View View Model (MVVM) Pattern
For those who are new to this term, you can read this. Otherwise you might want to move on.
MVVM is just a pattern. There is no strict procedure on how to implement it. This pattern is created for developers to separate the logic of their application, providing a nice way to do unit testing and creating blendability between designer <-> developer.
What this means is that designers can focus on playing around with the Views and developers can provide back-end data in the View Model (that perform queries against the Model) independently. The View can then just hook the View Model into it and create the bindings between the UI Elements <-> data. Moreover, developers can provide designers with dummy data to test while designing the Views.
People have been creating tools and frameworks to assist this pattern, such as MVVM Light, MEF, and Prism. However, I won't be using any of those since my application is really simple.
Confused? Let's see in action!
Model
Rather than calling WCF Service straight in our XAML code behind, we will create a class called AlkitabService.cs in our Model folder. It is nice to have a high level layer that provides us with one logical purpose: Our Data Source!
This class will provide us sets of functions that call WCF Service functions asynchronously. Asynchronous call is what Silverlight is all about right? :)
Views
I am not much of a designer, but I like clean design :) Here is what the application looks like:

I won't show you the XAML just yet because I will show it when I'm doing the bindings. In this project I am using Telerik Silverlight controls (RadComboBox and RadGridView). Simple reason, they have nice features such as Auto-Complete, Filtering, etc. However you can use the normal Silverlight controls to do the same thing.
View Model
Here is the main player. This is where all the logic resides. Inside the folder, I created two classes: ViewModelBase.cs and AlkitabViewModel.cs
ViewModelBase is just a base class that implements INotifyPropertyChanged. Remember that all data/properties exposed in the UI need to have this event raised to notify the UI elements.
Inside AlkitabViewModel.cs is where we call our Model and store the data into our class properties that we can then bind to our UI.
Notice that we raise the NotifyPropertyChanged event in the setter of all properties.
I hope you don't get a headache from this. In the next post I will talk about hooking up our ViewModel to our Views and perform the bindings. I will also quickly explain the Commanding in Silverlight 4.
Silverlight 4 Simple Project Part 4 (Binding & Command)
In Part 2 we already created our WCF Service that can return some results to us when functions are called.
In this post I will start building my Silverlight Application :)
Silverlight Project
Create new project inside the same solution. Choose Silverlight Application and name it AlkitabApplication. Right-click the project and choose Add Service Reference. click Discover and you can see that our AlkitabWebService.svc is shown. Easy!

In the above picture you can also see that I created three new folders called Model, ViewModel, and Views. Move the MainPage.xaml to the Views folder.
Model View View Model (MVVM) Pattern
For those who are new to this term, you can read this. Otherwise you might want to move on.
MVVM is just a pattern. There is no strict procedure on how to implement it. This pattern is created for developers to separate the logic of their application, providing a nice way to do unit testing and creating blendability between designer <-> developer.
What this means is that designers can focus on playing around with the Views and developers can provide back-end data in the View Model (that perform queries against the Model) independently. The View can then just hook the View Model into it and create the bindings between the UI Elements <-> data. Moreover, developers can provide designers with dummy data to test while designing the Views.
People have been creating tools and frameworks to assist this pattern, such as MVVM Light, MEF, and Prism. However, I won't be using any of those since my application is really simple.
Confused? Let's see in action!
Model
Rather than calling WCF Service straight in our XAML code behind, we will create a class called AlkitabService.cs in our Model folder. It is nice to have a high level layer that provides us with one logical purpose: Our Data Source!
This class will provide us sets of functions that call WCF Service functions asynchronously. Asynchronous call is what Silverlight is all about right? :)
Views
I am not much of a designer, but I like clean design :) Here is what the application looks like:

I won't show you the XAML just yet because I will show it when I'm doing the bindings. In this project I am using Telerik Silverlight controls (RadComboBox and RadGridView). Simple reason, they have nice features such as Auto-Complete, Filtering, etc. However you can use the normal Silverlight controls to do the same thing.
View Model
Here is the main player. This is where all the logic resides. Inside the folder, I created two classes: ViewModelBase.cs and AlkitabViewModel.cs
ViewModelBase is just a base class that implements INotifyPropertyChanged. Remember that all data/properties exposed in the UI need to have this event raised to notify the UI elements.
Inside AlkitabViewModel.cs is where we call our Model and store the data into our class properties that we can then bind to our UI.
Notice that we raise the NotifyPropertyChanged event in the setter of all properties.
I hope you don't get a headache from this. In the next post I will talk about hooking up our ViewModel to our Views and perform the bindings. I will also quickly explain the Commanding in Silverlight 4.
Silverlight 4 Simple Project Part 4 (Binding & Command)
Comments
Post a Comment